-
Graduation
-
Graduation Announcements
-
Graduation Signs
-
Graduation Photo Boards
-
Graduation Yard Signs
-
Advice & Memory Cards
-
Graduation Thank You Cards
-
Graduation Napkins
-
Graduation Coasters
- Weddings
- Save the Dates
- Wedding Invitations
- Enclosure Cards
- Programs
- Accessories
- Reception
- Favors
- Wedding Signs
- Thank you Cards
- Showers & Parties
- Occasions & Holidays
- Business
- Calendars
- Sports Schedules
- Household Tips
- Postcards
- Essentials
- Business Christmas Cards
- Gifts & Favors
- Yard Signs
- Custom Magnets
- Business Extras
- Photo Tiles
- Colleges & K12
Printing Canva Art Files
File Size Set-up
Make sure to include bleed. Bleed means your background color or pattern should extend beyond the edges of the finished size and not stop at the edge. A plain white or colored border does not work for bleed and may print in the final product.To set this up, make your artwork file .25” larger in both width and height than your finished card size. For example, a 5” × 7” card should have artwork sized at 5.25” × 7.25”. The final product will now print all the way to the edges.
Crop/Trim Marks
These are not needed on a file, but it will not hurt if they are there.Color Profile
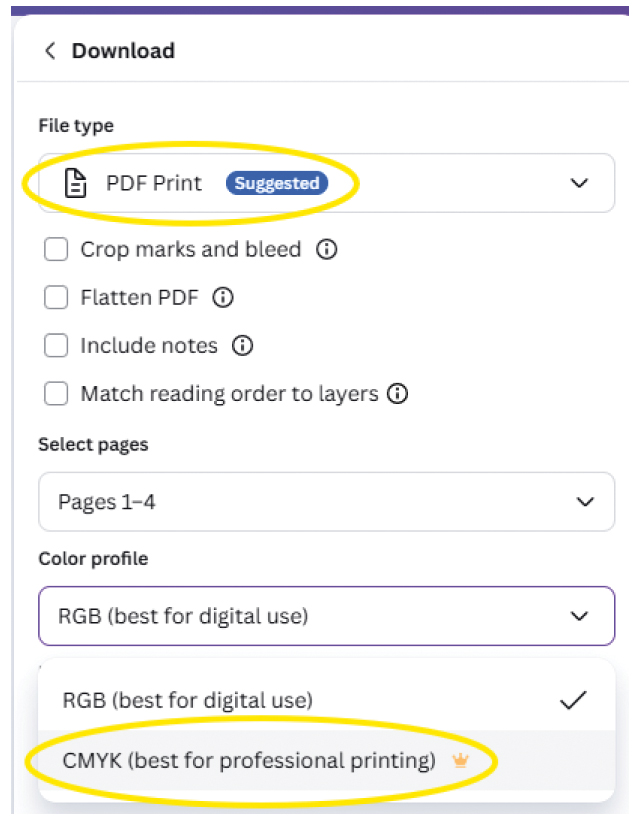
We print in CMYK color, so an RGB color file may appear different.Downloading Your Creation
Download the file as a PDF Print file for the highest quality. If you do not, it will not hold it's size and will decrease to 4.77" x 6.66".
Click "Share" > "Download" select "PDF Print”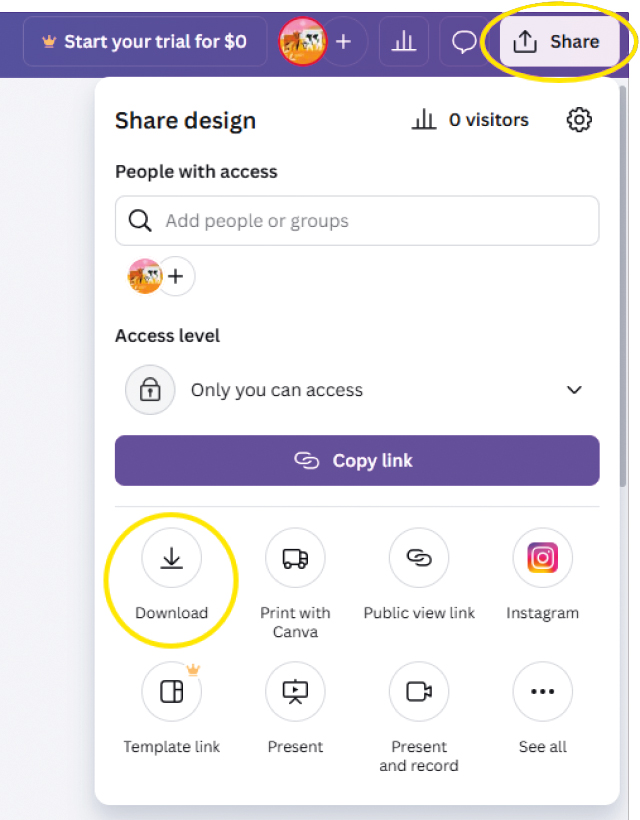

file size
set-up
bleed
beyond edge
cmyk
color profile
crop/trim marks
not needed
download
a PDF print fileAdding Foil
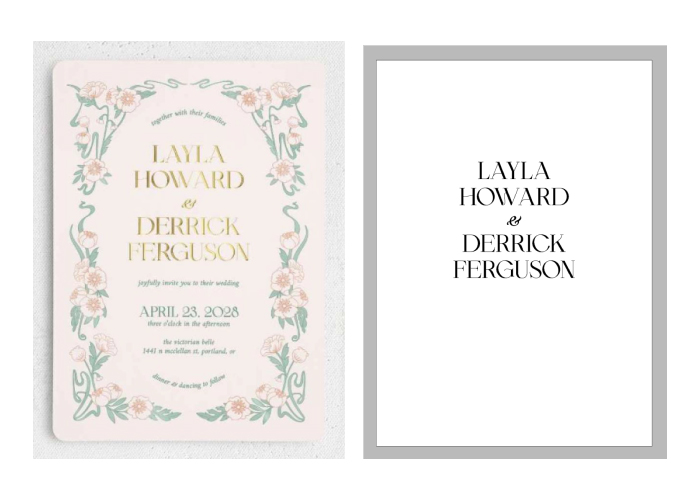
We can add foil to your custom artwork. There is a per piece foil cost that will be added following checkout.
Add a design request indicating where you would like foil added. We suggest you provide a “foil layer” file of the foil sections isolated. This helps our designers set-up your proofs quickly. You may incur an additional graphics fee due to difficult set-up without foil layers.
Please note that there are limitations and sometimes it will not be possible to foil.
Upload Your File
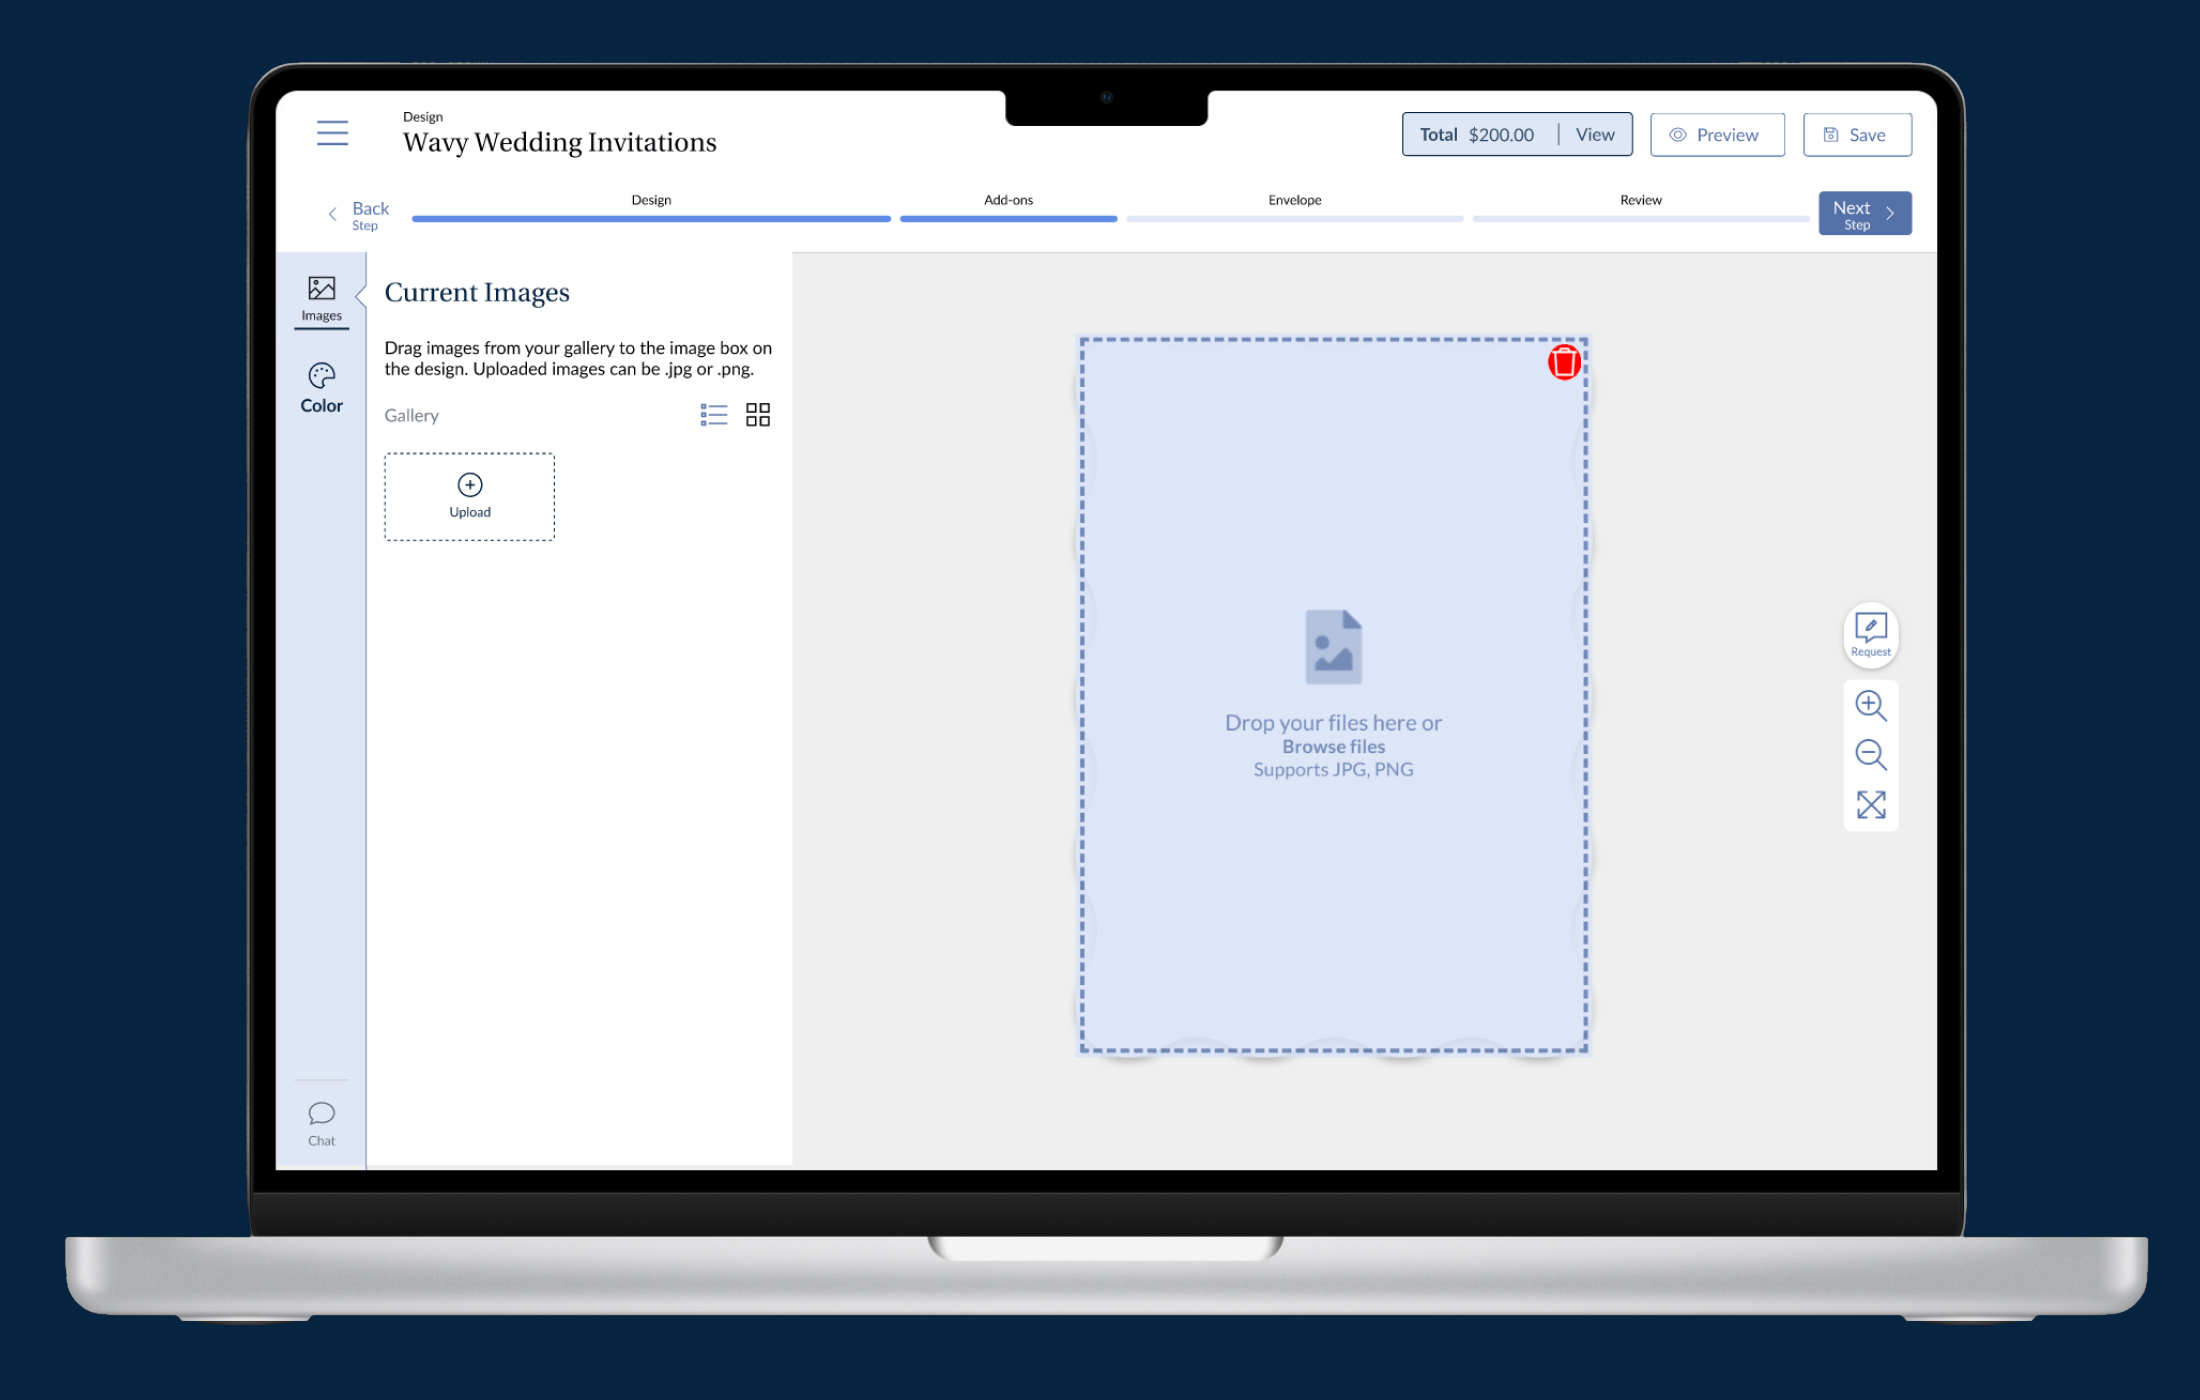
Add your files in our Design Studio to start. If you have new or additional files after checkout, you can upload them to this link.
Use our upload link for:
Photos
Mailing lists
Custom artwork
Logos
Mockups
Canva Resources
Margins, bleed, and crop Marks
How do I print my design?
File converterStep-by-step guide
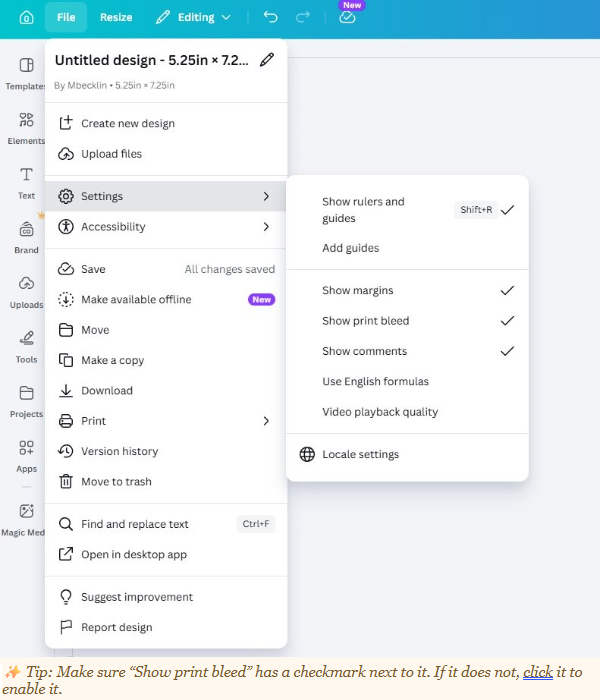
Step 1 — Open the File Menu
From your Canva design, click “File” in the top-left corner of the screen. A dropdown menu will appear.Step 2 — Go to Settings
In the File menu, hover over or click “Settings.” A submenu will slide out to the right showing display options for your design.
Tip: Make sure “Show print bleed” has a checkmark next to it. If it does not, click it to enable it.Step 3 — Confirm Bleed Is Visible on Your Canvas
Once enabled, your design canvas will show a thin border around the outside of your card. This shaded area represents the bleed zone. Extend your background color or image to fill this area completely.
Tip: Also enable “Show margins” to see the safe zone — keep important text and design elements inside this inner boundary so nothing gets cut off during trimming.Before You Download — Quick Checklist
Background color or photo extends into the bleed area (beyond card edge)
No important text or faces are in the bleed zone )
“Show print bleed” is checked in Settings )
“Show margins” is checked so you can see the safe zone )
When downloading, choose PDF (Print) format for best qualityDownloading with Bleed Included
When you are ready to download your final design:
1. Click “File” → “Download”
2. Select “PDF – Print” as the file type
3. Check the box that says “Crop marks and bleed”
4. Click “Download”Tip: Always send the PDF Print version (with bleed) to your printer, not the standard PDF or PNG, to ensure the best print quality.
-
Graduation Announcements